Hosting your blog on GCP with GHOST, Nginx, Lets Encrypt, Mail Gun and Cloudflare - Part 2
Setting up HTTPS and mail for self-hosted GHOST blog on GCP free-tier.

In Part 1 of this article, we took a look at how to set up your base VM and get the shell script ready for your docker container. In this article let's look quickly at how to install Nginx, set up the HTTPS certificates with Certbot and LetsEncrypt and check our mail settings for our newly created blog.
Installing Nginx is straightforward. Nginx will act as a frontend intercepting requests forwarded to our server and forwarding it inturn to our docker container which is listening on a custom port.
sudo apt-get install nginxOnce installed let us create a file inside the sites-enabled folder of Nginx.
/etc/nginx/sites-enabled/yourdomain.xyz
server {

	server_name <YOUR DOMAIN>.com www.<YOUR DOMAIN>.com;

	location ~ /.well-known {
		allow all;
		break;
	}

	location / {
		proxy_pass http://127.0.0.1:2368;
		proxy_set_header X-Real-IP $remote_addr;
		proxy_set_header HOST $http_host;
		proxy_set_header X-Forwarded-Proto https;
		proxy_set_header X-Forwarded-For $proxy_add_x_forwarded_for;
	}
}
Set up the directories that will be used by LetsEncrypt for server validation.
mkdir /var/www/.well-known
chmod 755 /var/www/.well-known
Install Certbot and the plugin for Nginx.
sudo apt install certbot python3-certbot-nginx
Let Certbot do its job. Remember in the previous article we had looked into setting up Cloudflare for our domain. You would want to temporarily pause Cloudfare in this domain so that the proxy features or disabled. You can also do this by enabling maintenance mode. This would help Certbot during the checks and allow it to complete the process. Take care of this proxy thing during renewals also.
sudo certbot --nginx -d example.com -d www.example.com
Replace your domain in the above command.
MAIL GUN API credentials
Once the Ghost settings interface is up and running you can key in your Mailgun API credentials
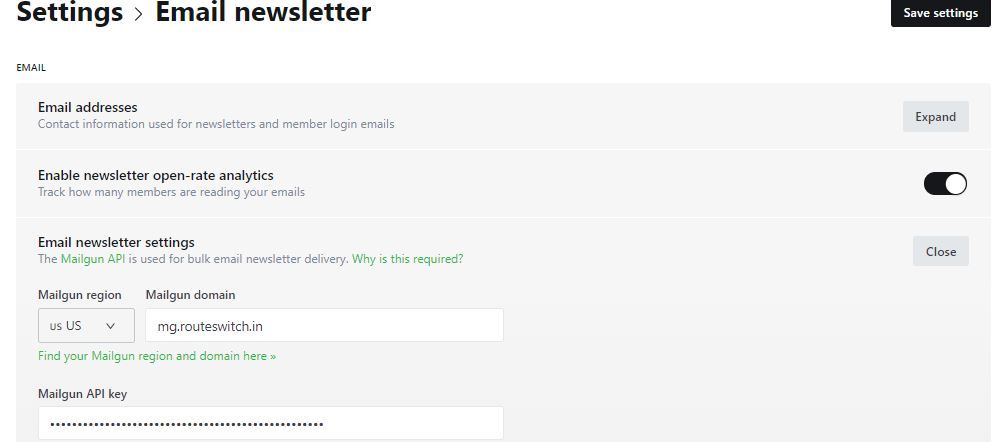
Note this is in addition to the SMTP credentials that we had configured in Part 1.
ZOHO setup. Now we have configured the mail dispatch settings that will help us send emails from our domain ( newsletters etc). But it will not let us receive any emails. That's why it is recommended to configure a separate sub-domain for Mailgun that will take care of our sending requirements. To have a mail server setup for our root domain we can take help from Zohos always free tier. Their website offers complete instructions on setting up your DNS records and other settings. Check it out here.
I think by now you would have given the docker container we built in the previous article a spin. It would be listening on the custom port we configured. Configure your firewall settings accordingly.
Yay!. We now have HTTPS configured, set up proxying through Cloudflare, our bulk email setting should work now (now that we have configured mail gun), we have an email service for us through ZOHO and that's pretty much it. I think we pretty much have everything to get a basic domain and a website up and running. There is one thing left. Backups. You can use your own means to back up the ghost_blog folder that we created to back up the content in total including images and stuff.
Ghost also gives you an option to backup the contents by downloading a JSON file. You can choose to do that also. But it doesn't include images and other contents. Should you bump into any issue setting up the blog after following the instructions let me know in the comments.